
Articles 3D Audio Custom Controls General RB Graphics Hacks Mac OS X Menus Novelty Printing REALbasic 2005 REALbasic 2006 Registration Resources Reviews Serial Speech Sockets XML Video Resource Links News Current News February 2006 January 2006 December 2005 November 2005 October 2005 September 2005 August 2005 July 2005 June 2005 May 2005 April 2005 March 2005  REALbasic for Dummies by Erick Tejkowski  Learning REALbasic through Applications REALbasic for Macintosh REALbasic Cross-Platform Application Development 
Older files are in Stuffit 5 or greater format. Newer files are ".Zip". Download StuffIt Expander |
|

Based on suggestions from ResExcellence readers, this week's tutorial will continue with the project started in the previous tutorial - Picture Extractor. Last week, we looked at how to open any application's resource fork and view the enclosed 'PICT' resources. We also added the ability to export any of the 'PICT' resources to a PICT file. Several readers wrote saying that it would be nice to give users the chance to change any of the 'PICT' resources located within the application's resource fork. This week, we'll do just that. The result is a handy little application that will let you hack away at your favorite startup screens, about boxes, and assorted resource tom-foolery without the usual resource shuffle. Expand the Interface If you are following along from last time, you can simply open last week's project. If you didn't catch the last article, you can:
Once you have the project opened, open Window1 with a double-click. Resize Listbox1 so that it is 300 pixels high and add a PushButton (named PushButton3 by default) directly below Listbox1. Change the Caption property of PushButton3 to reflect its functionality. For example, I changed it to "Replace with PICT" (without quotes). By now, your interface might look like this: 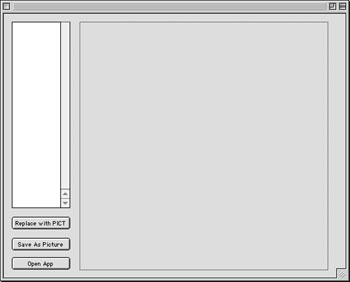
Suppose that you want a user to click this button only when there is a selection in Listbox1. You could accomplish this with a bunch of code, but REALbasic makes it a no-brainer. To make PushButton3 automatically enabled when Listbox1 has a selection (and conversely disabled when the Listbox has no selection), you must "bind" the PushButton to the Listbox. To bind two controls together, press Command-Shift and drag from PushButton3 to Listbox1. As you do, a small line will appear and show the connection of the two controls. When you let go of the mouse, REALbasic displays a dialog asking you which kind of binding you'd like to attach between these two controls: 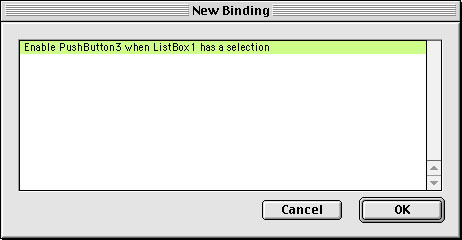 Click to expand For this example, there is only one choice. Click OK, and Window1 shows the bound controls in your interface. Don't worry, this line is invisible when the application runs. If you mess something up, you can select the line and press Delete to remove the binding. By now, your interface should look like this: 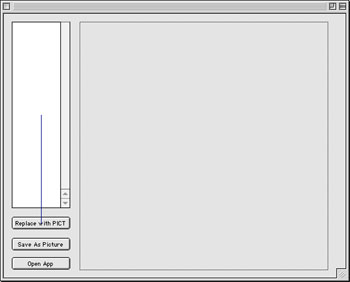
The great part about this binding is that REALbasic takes care of enabling and disabling the PushButton for us. We don't need to write any other code. Now, whenever a user selects an item in the list, the PushButton will spring to life. Deselection disables the PushButton. Lots of function; little work. These great little touches might help explain REALbasic's popularity. Add the Code Double-click PushButton3 to open its Action Event in the Code Editor. Add the following code: dim sourcefile as FolderItem This code begins by presenting an Open File dialog box and permitting a user to open a 'PICT' file type. This is the picture that will go into the application's resource fork. If the user chooses a picture file, we then create a resource number based on the currently selected item in Listbox1. We will transfer the graphic from the picture file to the 'PICT' resource using this resource number. This will replace the previous 'PICT' resource, so make sure to work only on backup copies of applications. With a resource number readied, we
Next, we do the dirty deed - copying the picture from p to the resource fork of the application. The magic here occurs courtesy of the AddPicture method of the ResourceFork class. AddPicture has three parameters:
The code concludes by closing the resource fork of the application and refreshing the display of Canvas1. Test and Build Select Debug->Run to test your handiwork. When you are convinced that everything works smoothly, select File->Build Application to create the executable application. Now, get changing those splash screens! As is customary, you can: |
||||


|
||||||||||||||||||||||||||||||||
Maintained by the Staff of ResExcellence. This entire site ©1997-2006 ResExcellence
Privacy Statement? Sure we gotta Privacy Statement.
[an error occurred while processing this directive]