This week we'll begin a multi-part tutorial about cropping graphics with REALbasic. These tutorials will cover the basics of how to implement click-and-drag graphics selection and cropping, like you'll find in most popular graphics applications.
The tutorial emulates a Cocoa project available from Apple. As we progress through the project each week, we'll add various features to match the original example. So, go check out the original example and come back here ready for some REALbasic coding. NOTE: This demo is made with OS X in mind.
Build the Interface
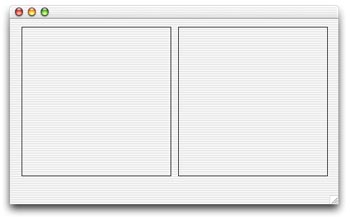
Launch REALbasic, and add two Canvas controls to Window1. Resize each one to a size of 256 x 256. You can position them anywhere in the window that you want, but if you are trying to match the Cocoa project, position them next to each other in a horizontal arrangement.
You should also add a 256 x 256 image to your REALbasic project. If you don't have an image, one accompanies the project download at the end of this tutorial. It is named scenery.
Add the Code
Double-click the Window Editor of Window1 to open its Code Editor. Choose Edit-New Property and create the following properties.
To initialize the two Picture objects, add the following code to the Open event of Canvas1:
pictureSrc = newpicture(canvas1.width,canvas1.height,32)
pictureDest = newpicture(canvas1.width,canvas1.height,32)
pictureSrc.graphics.drawpicture scenery,0,0
pictureDest.graphics.drawpicture scenery,0,0
Next, enter this code in the MouseDown event of Canvas1 to begin a click-and-drag operation:
startX = X
startY = Y
lastX = X
lastY = Y
return true
Then, add this code to the MouseDrag event of Canvas1 to track the drag operation:
dim g as graphics
g=pictureSrc.graphics
if lastx<>x OR lasty<>y then
lastX = X
lastY = Y
g.foreColor=rgb(255,255,0)
g.drawpicture scenery,0,0
g.drawrect startX,startY,lastX-startX,lastY-startY
g=me.graphics
g.foreColor=rgb(255,255,0)
g.drawpicture scenery,0,0
g.drawrect startX,startY,lastX-startX,lastY-startY
end if
Next, we'll need to handle the MouseUp event of Canvas1. This code takes care of copying the selection from the source image to the destination image, which will appear in Canvas2.
dim g,gg as graphics
g=pictureDest.graphics
gg=canvas2.graphics
g.clearrect 0,0,g.width,g.height
gg.forecolor=rgb(255,255,255)
gg.fillrect 0,0,g.width,g.height
if startX<lastX and startY<lastY then
g.drawpicture scenery,startX,startY,lastX-startX,lastY-startY,startX,startY,lastX-startX,lastY-startY
gg.drawpicture scenery,startX,startY,lastX-startX,lastY-startY,startX,startY,lastX-startX,lastY-startY
elseif startX>lastX and startY>lastY then
g.drawpicture scenery,lastX,lastY,startX-lastX,startY-lastY,lastX,lastY,startX-lastX,startY-lastY
gg.drawpicture scenery,lastX,lastY,startX-lastX,startY-lastY,lastX,lastY,startX-lastX,startY-lastY
elseif startX>lastX then
g.drawpicture scenery,lastX,startY,startX-lastX,lastY-startY,lastX,startY,startX-lastX,lastY-startY
gg.drawpicture scenery,lastX,startY,startX-lastX,lastY-startY,lastX,startY,startX-lastX,lastY-startY
elseif startY>lastY then
g.drawpicture scenery,startX,lastY,lastX-startX,startY-lastY,startX,lastY,lastX-startX,startY-lastY
gg.drawpicture scenery,startX,lastY,lastX-startX,startY-lastY,startX,lastY,lastX-startX,startY-lastY
end if
To draw the image in Canvas1, add this code to the Paint event of Canvas1:
g.drawpicture pictureSrc,0,0
Finally, to draw in Canvas2, add this code to its Paint event:
g.forecolor=rgb(255,255,255)
g.fillrect 0,0,me.width,me.height
g.drawpicture pictureDest,0,0
That's it! Choose Debug-Run to test your work.

Conclusion
You can download the completed project here. We'll continue adding features to the project next week. See you then!